How to Edit Photos with AI Using Text Prompts
Learn how to edit photos online with AI text prompts and a brush. Follow illustrated outfit and object-editing examples, then review and download your result.
To edit a photo with AI, upload your original image, describe the change you want, and generate a new version. For a specific object or small area, select it with a brush before writing your instruction. Compare the result with your original before downloading it.
This guide walks through both approaches in PomiGen’s free online AI photo editor. We’ll use a blazer color change to explain text prompts, then a cushion edit to show how a brush selection helps identify a target. The images are examples from PomiGen’s existing editing gallery; your result will depend on your image, prompt and model.
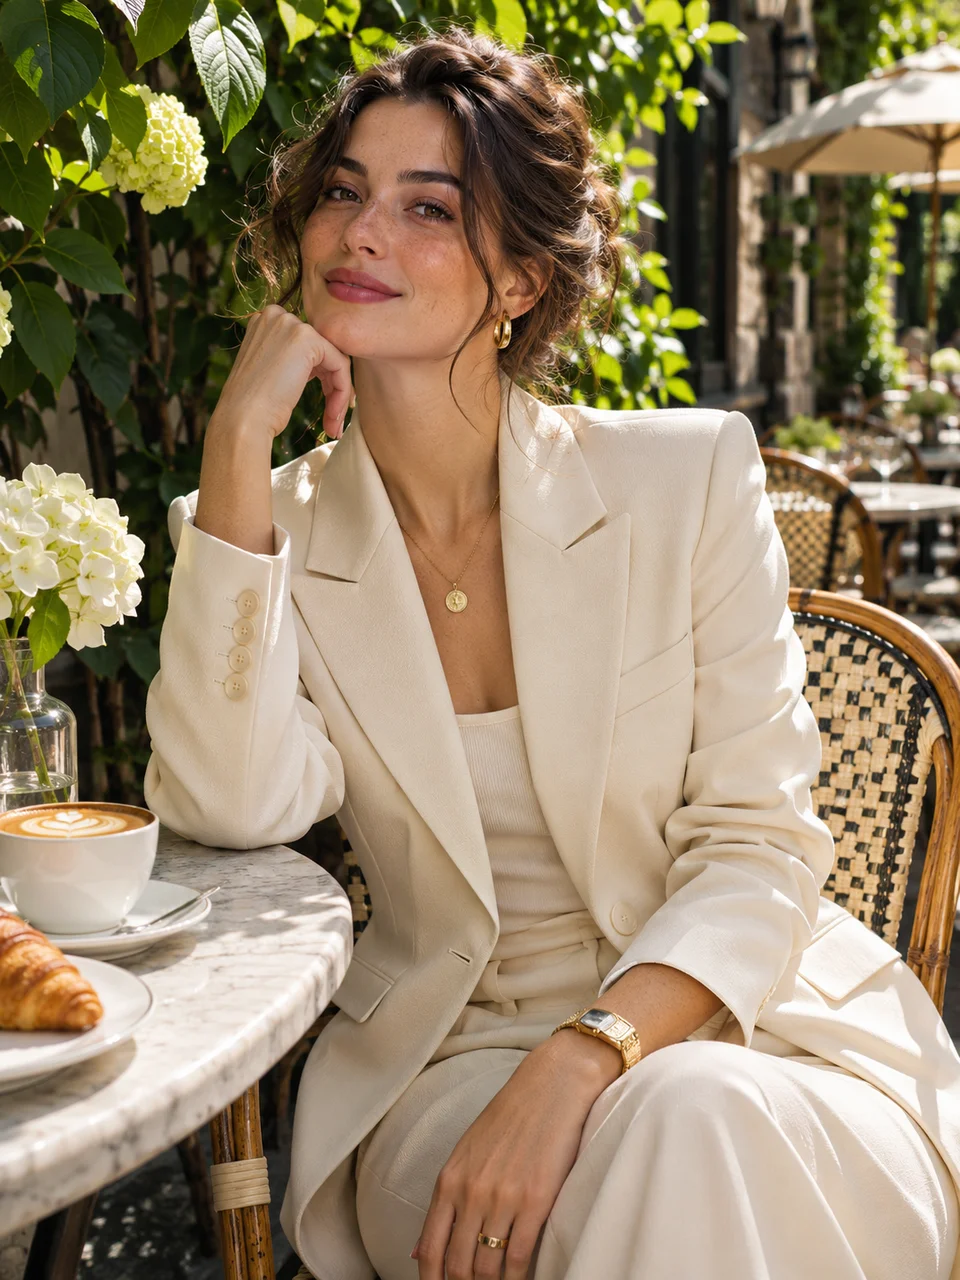
Original
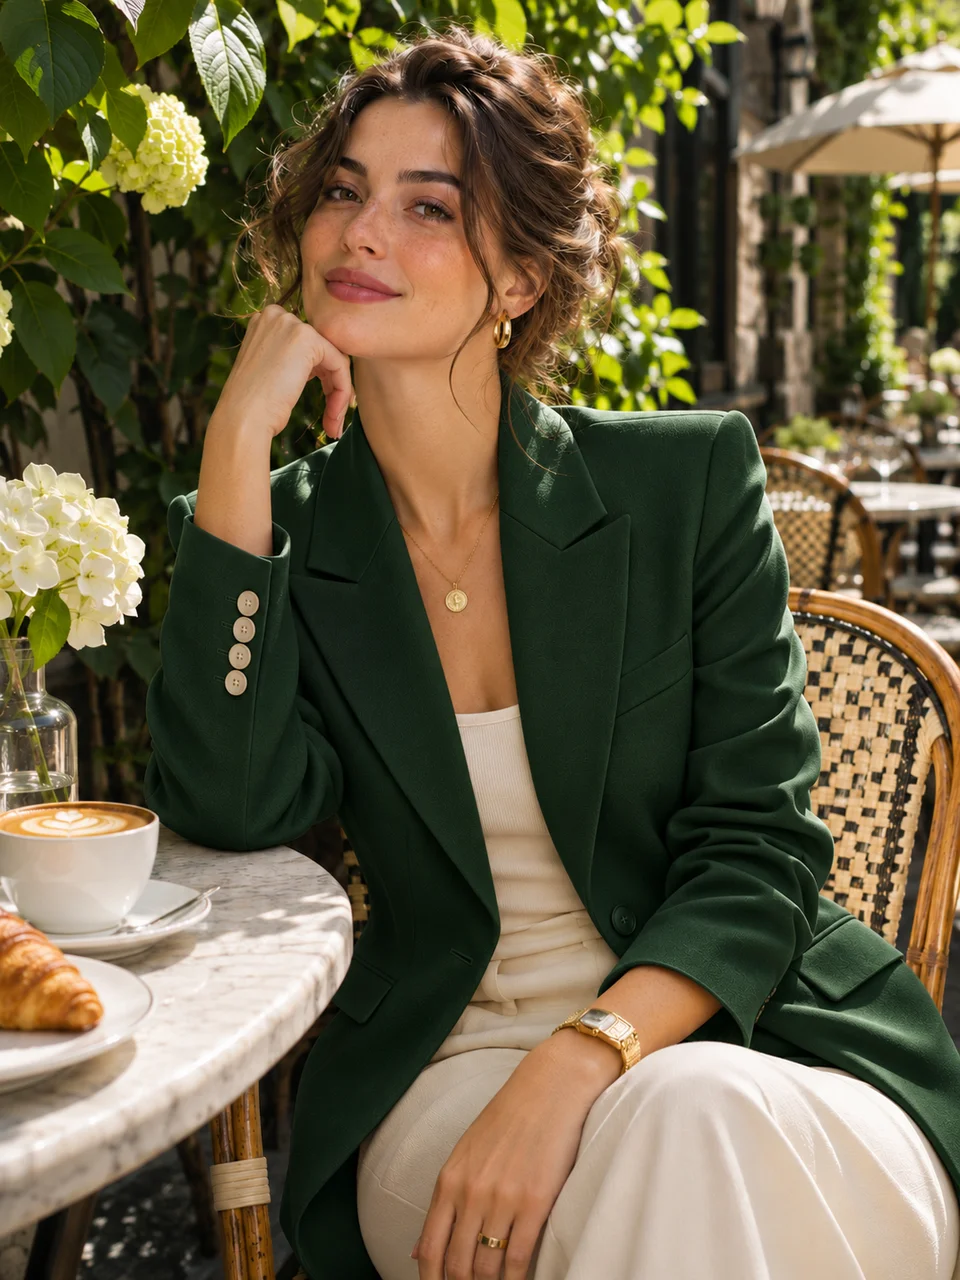
Edited
1. Upload the photo you want to edit
Open the photo editor and add your image in Reference image. Use the original file rather than a screenshot when you have it: the model has more detail to work with, especially around faces, fabric and small objects.
PomiGen accepts JPEG, PNG and WebP files up to 10 MB per image. You can add up to five reference images, but start with one for your first edit. Extra references are useful when you need to show a particular outfit, object or visual style; make their purpose clear in your prompt.
For this example, the task is deliberately narrow: change the ivory blazer to forest green. The photo already supplies the person, café, pose and lighting. You do not need to describe the entire scene from scratch.
2. Write a prompt that names the change and what to keep
A useful photo-editing prompt has three parts: the target, the change, and the details to preserve.
01 · TARGET
The ivory blazer
Identify the object you want to edit.
02 · CHANGE
Make it forest green
Specify the color, material or replacement.
03 · PRESERVE
Person, pose and lighting
Name the details that should stay.
Here is a prompt you can copy and adapt:
Change the ivory blazer to forest green. Keep the person,
pose, café and lighting unchanged.
Compare that with “make this photo better.” The specific instruction gives the model an object, a color and a boundary. “Better” leaves all three open to interpretation.
You can add a material or fit when it matters—for example, “matte wool” or “a tailored fit.” Avoid adding unrelated requests to your first attempt. If you change the outfit, background, hair and lighting at once, it becomes harder to identify which instruction caused an unwanted result.
For more clothing ideas, open the AI clothes changer.
3. Use a brush when you want to edit one area
Text alone works well when the target is easy to identify. A brush is helpful when the photo contains several similar objects, or you want to point to a small detail without describing its location at length.
In the editor, upload a photo, select Brush an area to edit, and paint over the object you want to change. Use the erase or undo controls to correct the selection, then apply it and write the instruction. The brush identifies the area; the prompt explains what should happen there.
The cushion example below shows the original, the marked area and an edited result. The red overlay represents the editing selection, not a color to request in the final photo.
1 · Original

2 · Mark the area
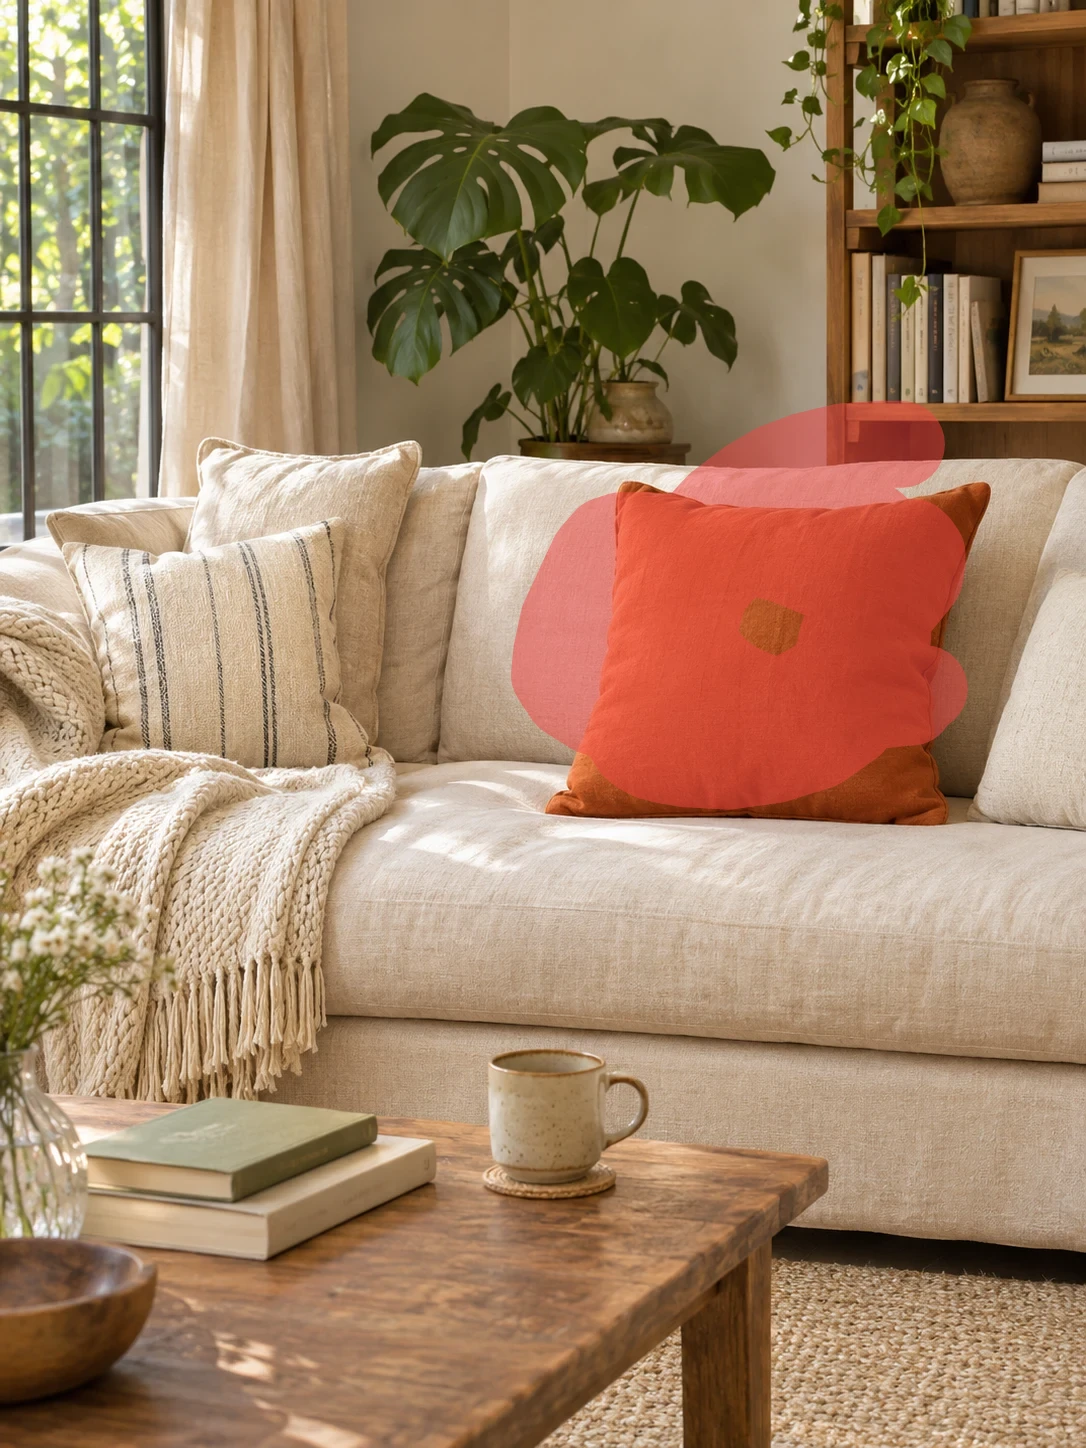
3 · Edited

Try this instruction with a similar photo:
Change the selected solid orange cushion to a cream cushion
with dark blue vertical stripes. Keep the sofa, other cushions,
blanket, room, lighting and composition unchanged.
A selection guides the model, but it is not a guarantee that every pixel outside the selection will remain identical. Check the surrounding edges and nearby objects after generating.
| Your task | Start with |
|---|---|
| Change a clearly identifiable outfit or background | A text prompt naming the target |
| Change one of several similar objects | A brush selection plus a prompt |
| Replace a small word or design detail | A brush selection plus the exact requested text |
| Keep every unselected pixel mathematically identical | A pixel or layer editor with explicit compositing controls |
4. Choose your model and check the credit cost
Select an available model and resolution before generating. The editor shows the cost for your current settings. Higher-resolution options and different models can have different credit costs; a larger setting is not a substitute for a clear instruction.
PomiGen offers signup credits to new accounts. This is a starting balance, not unlimited free editing, and some model settings may cost more than that balance. Check the editor and current pricing before running an edit or retrying it.
Start with one version and inspect it before spending credits on variations. For a larger final image, first decide whether the edit itself is right, then choose the output settings you need.
5. Compare the result with your original
Look at more than the part you changed. In the blazer example, a useful review checks the new color alongside the face, hands, lapels and café setting.
Use this checklist:
- Requested edit: Is the target the right color, material or shape?
- Person: Do the face, expression, hands and pose still look right?
- Edges: Check hair, sleeves and places where the edited object meets its surroundings.
- Lighting: Do shadows and reflections fit the rest of the scene?
- Text and products: Read small lettering and inspect logos or important product details.
If something drifted, return to the original and make the next instruction narrower. For example, replace “change her outfit” with “change only the blazer color to forest green; keep the ivory top and trousers unchanged.” A smaller brush selection can also help clarify the intended area.
For an image you intend to publish, inspect it at its actual output size rather than relying only on a small preview.
6. Download the version you want to keep
Use the download control for the generated image. PomiGen’s download flow does not add a visible site watermark. File format and dimensions depend on the selected model and settings, so check the downloaded file before using it in a layout or uploading it to another service.
Keep your original photo and the prompt alongside the result. That gives you a clear starting point if you want to repeat the edit or try a different direction. Only upload photos you have permission to use, and read the privacy policy before uploading sensitive images.
Fix common photo-editing problems
| What happened | What to try next |
|---|---|
| The AI changed the wrong object | Name its position or mark it with the brush. |
| The face or background changed | Return to the original, narrow the request and explicitly name what to keep. |
| The result ignores part of a long prompt | Reduce the instruction to one main change. |
| Small text is misspelled or distorted | Select the text area and specify the exact replacement. Verify it manually. |
| A fabric edge or object boundary looks unnatural | Adjust the selection and request lighting and material consistent with the scene. |
| The edit looks right but the file is too small | Check the available resolution settings and their credit cost before generating again. |
Frequently asked questions
Can I edit photos online with AI for free?
You can start with PomiGen’s signup credits. Each generation uses credits according to the chosen model and settings. The editor shows the current cost; check it before generating rather than assuming every model is covered by the free balance.
Do I need to use the brush for every edit?
No. Start with text when the target is clear, such as “change the ivory blazer to forest green.” Use the brush when you need to identify a specific object or a smaller area.
Can AI keep my face exactly the same?
You can ask the model to preserve facial identity and avoid selecting the face, but generated edits can still change details. Compare the result with the original. Use a conventional editor when exact pixel preservation is essential.
Is editing an existing photo the same as text-to-image generation?
No. Photo editing starts with your image as a reference. Text-to-image generation starts from a written description without that original photo. For broader style or scene transformations guided by a reference, explore image-to-image generation.
Try one change on your own photo
Pick a photo with one thing you want to change. Name that change, add the details you want to keep, and inspect the result before making the next adjustment.